Created 29 January 2017
Pictures below!
Recently I had the idea to add some cold white LEDs to the underside of our garden bench. I thought it would look cool to have cold white light shining onto the grass from under the bench at night. I think the results are pretty cool. The end result is at the bottom of this page.
I have a 12 volt solar system that I use to power the lights which are on a timer. Currently the lights turn on at 2030 and turn off at 0200. The bench is about 20 metres away from the power supply and is connected by a cable hidden in the garden.
The LEDs
I went on to eBay and found an IP67 LED strip with cold white LEDs. The title of the auction was ’12V 24V Double Row Led strip SMD 5050 5m 600 led flexible rope tape ribbon light’. The eBay seller was ‘zhonglai8012-3′. I will include the link to the auction for now but in due course the listing will expire: http://www.ebay.com.au/itm/112015947718
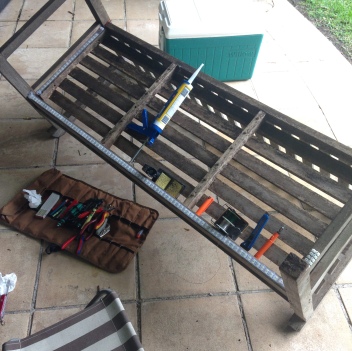
I measured out the lengths I needed to have four segments around the underside of the bench. In the end I only ran a length on one side and one on the back and one on the front. I wanted to place the strips so that you could not see the strips and LEDs themselves when looking at the chair. In the end I just placed them so you can see them from the front. I think it still looks cool this way. The strips I used run at 12 volts and draw about 900 mA.
I attached the trips using silicon sealant. I also used the silicon to seal the open ends of the plastic sheath covering the LED strip. This should provide enough protection from water ingress. Time will tell.
I soldered wires to connect the three segments before sealing the ends. The seller explained that the circuit boards are the same they use for RGB LEDs but that this was intact cold white only. So only two connections were necessary.
Here are some photos of the project and the end result. The grass is a bit brown from the bench keeping the sun off of it. This was a very easy project. The hardest part was soldering onto the flexible strip with the clear plastic covering around it. You just need to take your time and be careful not to overheat the copper solder pads on the trip. The project took me about an hour.


Very cute.
LikeLike